One of my early farming mentors, Jim Leap from UCSC shared a great piece of wisdom regarding growing garlic: " You can grow garlic or you can grow weeds, but you can't grow both."

Growing Tips: It is usually planted in the fall in temperate locales where winter temperature remain above zero degrees Fahrenheit. In colder climates such as the Northeastern U.S. it is planted in the spring, however larger bulb size is more difficult to obtain with spring planting. We typically plant garlic in the month of October. This enables the plant to become well established and grow a healthy root system and above ground foliage in the fall before slowing way down for winter and resuming growth once temperatures warm in February and March. Some hardneck varieties will wait to make any top growth until January & February, but rest assured they are busily making roots. If in doubt, you can dig up some cloves to gauge their progress.
Soil Preparation: What that implies is that garlic, like most Alliums, has a small root system and is therefor an inefficient feeder. . This means that if you want your garlic to size up nicely, you should have supplied adequate to abundant fertility in the form of compost, well balanced organic nitrogen fertilizer. A good approach is to cover crop your garlic area with buckwheat cover crop prior to planting and till this green manure crop into the soil 2-3 weeks before planting. Nitrogen is a crucial nutrient for garlic in the early part of the growing cycle. We use composted manure applied at 4-5 tons per acre. On a smaller scale you may want to consider composted steer or chicken manure applied at 100 pounds per 100' bed. Pelletized manure such as BioLive or NutriRich pellets applied at the same rate is a good plan.
Here in the Pacific Northwest we receive much of our rainfall over the winter which is wonderful for our forests and turning the landscape a brilliant emerald green, however, it can also leach nitrogen and other mobile nutrients from the topsoil. So a good strategy is to feed your garlic as the days lengthen and the sun returns in February and March when it begins to grow vigorously. We usually top dress with chicken manure or pellets and/or foliar feed with fish emulsion at this point. In our experience this can make a huge difference between moderate sized and huge bulbs. Spacing does make a difference as does effective weeding.
In areas where there is no threat of gophers eating your precious crop, a loose straw mulch right after planting works wonders to suppress weeds. If gophers are a concern early mulching can hide their damage, so waiting until the garlic is up can allow you to monitor gopher damage and allow your dogs to patrol more effectively. If you are without dogs, then it's on you to trap for gophers.

Spacing: Garlic does not make a very large plant, but it does take some space to make a nice big plant. We usually space garlic 3-4 rows per 4 foot wide bed with 8-10 inches between plants. Planted closer together and you may sacrifice bulb size and make weeding more difficult.
Planting technique: Break up the bulb into individual cloves, taking care to try and disturb the clove wrappers as little as possible. Hardneck types tend to lose some wrappers in the process of breaking them up; this is normal. Garlic should be planted within a few weeks of planting to avoid the cloves drying out. Place cloves into the soil as deep as they are long. This usually means planting to a depth where 1-2” of soil covers the tops of the clove. If planted too shallow, the action of frost heave can push garlic right out of the ground. Planted too deeply, garlic can rot in wet soils. In general the larger the clove planted = the larger the eventual plant and bulb. Henceforth, it's best to plant the larger cloves and eat the smaller ones.

Late Winter/ Early Spring Fertilization: Depending upon where you are growing your garlic, the initial fertility that you applied may have been used up, or washed out of the soil due to heavy winter rains (as is the case here in Oregon). Using composted manure or an organic pelletized fertilizer is best. Alternately you can spray with a high nitroigen foliar spray.
Weeding & Mulching: As soon as the soil is dry enough to begin weeding (which is sometime between mid-February and mid March here in Oregon) it is vital to give your garlic the competitive advantage it needs to thrive. We typically weed and then mulch with straw after.
Irrigation: Garlic wants to remain growing in reasonably moist soil until just before harvest so make sure to ensure that you are adequately watering it.
Pre-Harvest: Stop watering about 10 days pre-harvest (for us this is about summer solstice, anticipating a July 4th harvest)
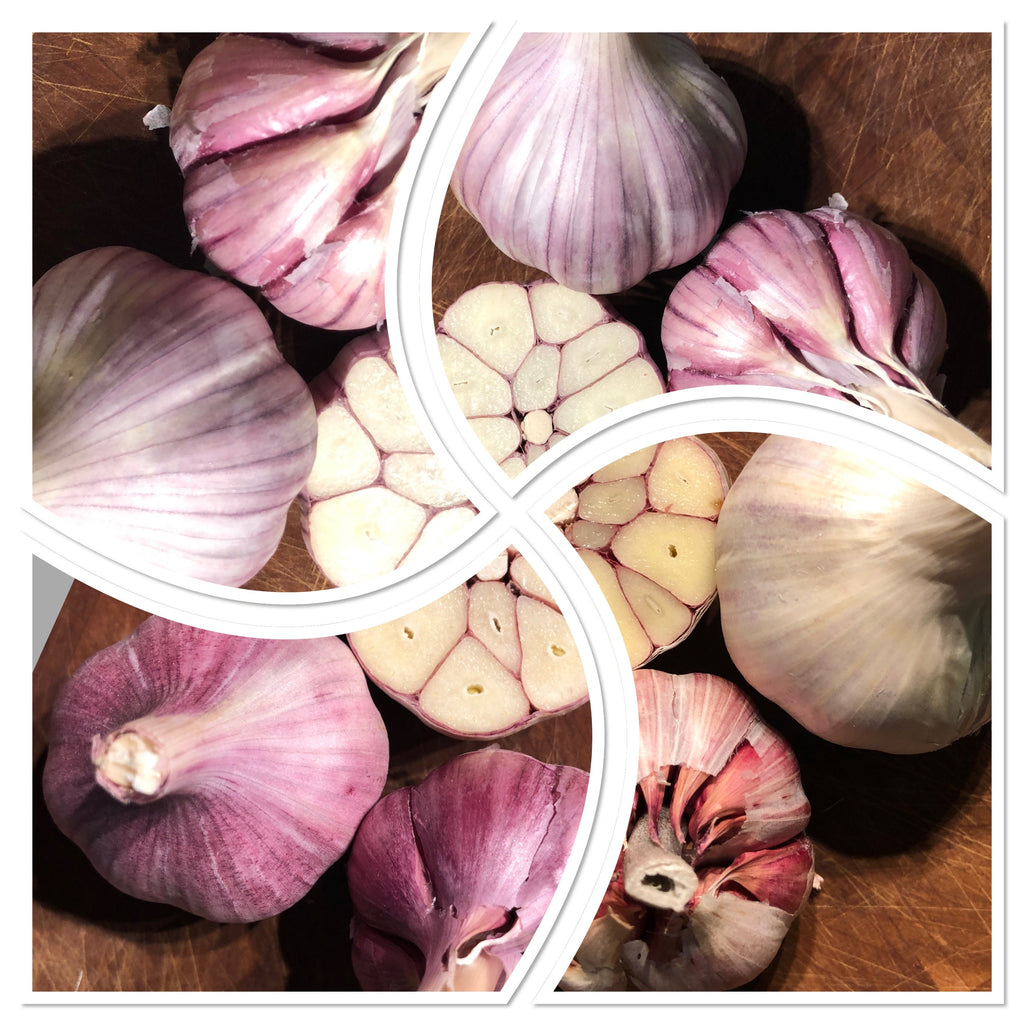
Harvest: Harvest your garlic when the leaves begin to yellow and dry down. We usually use the number of remaining green leaves as a gauge to determine the right time to harvest. I want to see a minimum of 5-6 green leaves left as each leave equates to one bulb wrapper, so you can imagine that after cleaning each bulb you’ll want to have some wrappers left for optimal storage ability. Cure in a shady shed, or garage, then clip roots and tops with about ½” of stem. Softnecks can be braided for longest storage
Comments (0)